This guide will walk you through how to add activities to your Xert account, and how to manage your settings to ensure you’re getting, and sharing, the data you’d like.
Skip ahead to:
Sync with Strava
Sync with Garmin Connect
Import files from TrainingPeaks
Manually Uploading your Activity Files
Manually Create Activities
Before beginning, a quick note about terminology. In Xert, ‘Activities’ are your rides, runs, races, etc. They include the data captured by your power meter and on-board computer. For example, if you’re using a Garmin computer, each activity file may contain power, speed, duration, GPS, elevation, and much more. ‘Workouts’ are also ‘activities’, however ‘workouts’ are always structured. So…all workouts are activities, but not all activities are workouts.
Ideally, Xert works best when it can analyze data from your history to establish patterns between your training and your ability to perform. Upload/sync at least three months of data to ensure Xert has a good data set to analyze.
Sync With Strava
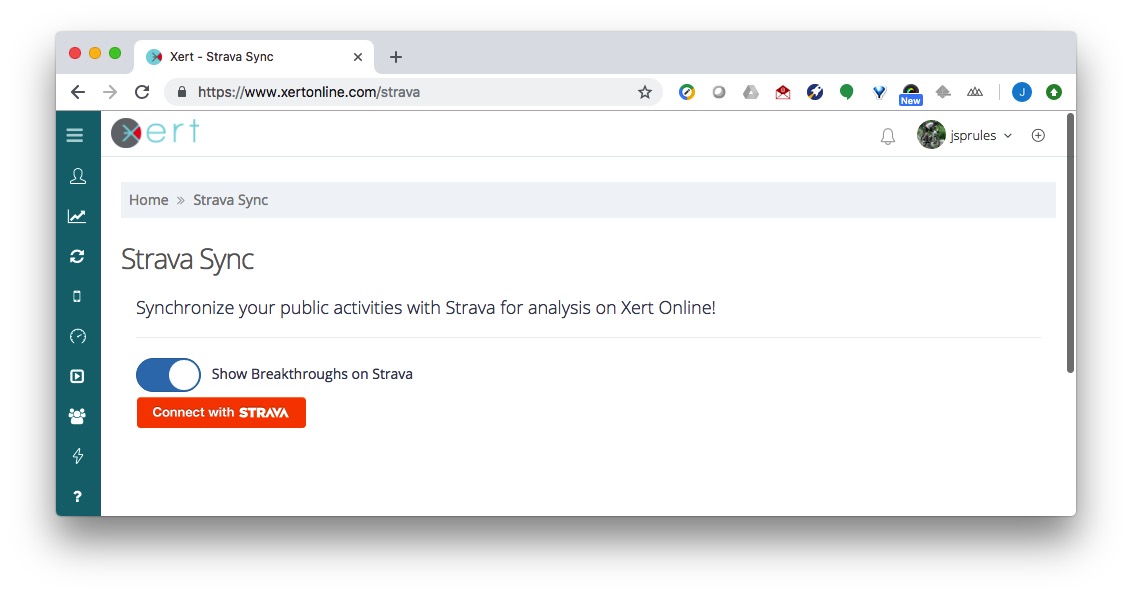
If you skipped configuring your Strava account when you first setup your account, navigate to Sync > Strava to set it up. Click on the Connect with STRAVA button and you’ll be prompted to login to Strava (if not already logged in) and authorize the Xert app.

Once authorized the following options are available on your Sync > Strava page:
- Show Breakthroughs on Strava: Enable this setting if you’d like to have Xert share your breakthroughs on your Strava Activity Feed.
- Edit Activity Types: This feature enables you to update the types of activities from Strava that you’d like shared with Xert. If you prefer to only sync Cycling activities to Xert, be sure to enable Ride and VirtualRide
- Sync from Strava to Xert: Enable this if you’d like all your Strava activities, and changes to activities (like updates to the name of an activity), automatically synced with your Xert account. If Strava is your primary source of activity data we recommend that you enable this option. If you leave this box unchecked you will need to select each individual activity you’d like synced with Xert by ticking the box next to it, and pressing the red ‘Sync’ button at the bottom right corner of the page.
- Sync from Xert to Strava: Enable this if you’d like all your activities & workouts done using Xert apps (Workout Player for iOS, Xert EBC for Android, or the Xert ConnectIQ Workout Player for Garmin) synced to your Strava account. If you use any of these apps we recommend this box also be checked.
- Date range (in grey box): To import your activities for the first time – if not already synced – clicking on the grey box containing the date range allows you to select the range you’d like. Once the table is updated with the activities from the date range, tick the box at the very top left corner of the table to select all activities on all pages and click the red ‘Sync’ button on the bottom right of the page (#7 below). Depending on the number of activities, this may take some time for Xert to import and analyze the activities.
- Tick box beside each activity: If you don’t want to select all activities, you can select individual activities by ticking the boxes next to each activity. After selecting the desired activities, press the red ‘Sync’ button (#7 below) on the bottom right of the page to import those activities to Xert.
- If you have previously enabled the ‘Sync from Strava to Xert’ setting (#4 above) you may not have any activities showing.
- Sync: Use this to sync the selected activity/activities into Xert
- Disconnect Strava icon: Click this button to disconnect your Strava account from Xert. Any Xert data synced with Strava will not be removed from Strava.
Click here for a more detailed step-by-step guide on how to upload your activities.
Sync With Garmin Connect
Similar to the Strava Sync, the interface to Garmin Connect will allow you to sync all new Garmin activities, as well as retroactively syncing older Garmin activities. To link your Garmin Connect account with Xert, navigate to Sync > Garmin Connect. Click the dark blue Connect button. You will need to sign in with your Garmin Connect credentials account, as well as Authorize Xert to access your activity data from Garmin. After connecting your Xert account with Garmin Connect, all new Garmin activities will automatically sync to Xert.
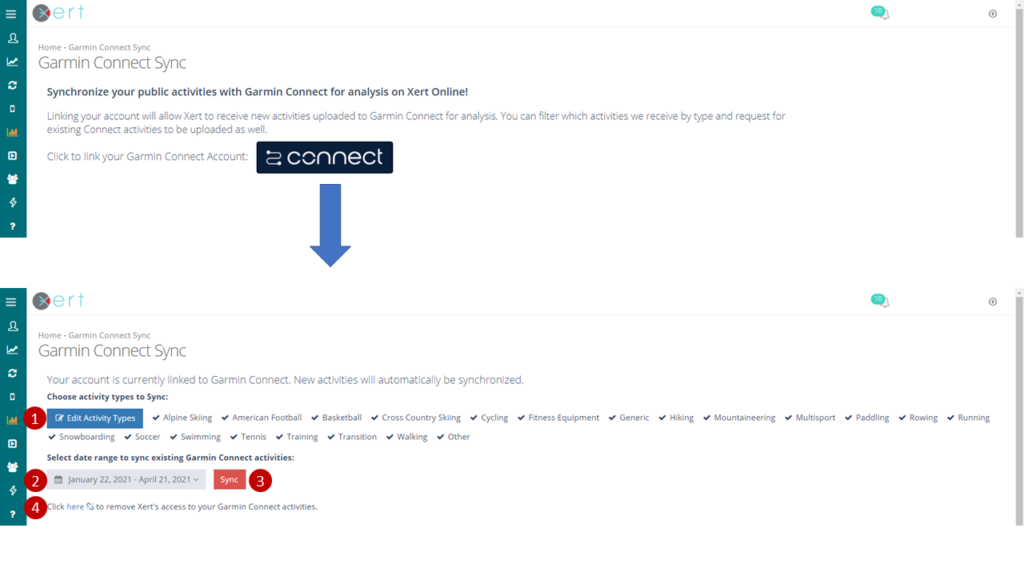
Once authorized the following options are available on your Sync > Garmin Connect page:
- Edit Activity Types: Edit the types of activities that you’d like to synchronize with Xert
- Date range (in grey box): Clicking on the grey box containing the date range allows you to select the range of activities that you’d like to sync with Xert. Once a starting and ending date has been selected, select the red ‘Sync’ button (#3 below) to sync all Garmin activities from that date range into Xert. Depending on the number of activities, it may take some time for Xert to import and analyze the activities.
- Sync: After a date range has been selected, clicking the Sync button will import all activities from the chosen time period to Xert.
- Broken Link: Select the broken link to disconnect your Xert Account from Garmin Connect. Any data synced from Garmin Connect to Xert will not be removed.
TrainingPeaks
You can also import files from TrainingPeaks but it’s a more manual process; unfortunately TrainingPeaks no longer allows third-parties from accessing data on TrainingPeaks. Follow this FAQ on how to upload your historical activities from TrainingPeaks.
Manually Uploading your Activity Files
To upload your historical activities manually, your best option is to plug in your bike computer into to your computer’s USB port and using the Upload Activity menu option under Sync, navigate to the folder on your device that has your activities, select them and upload them to the system. Xert will then queue them up for processing on the system. Depending on the number of activities, it may take a few seconds to several minutes to process them.

Manually Create Activities
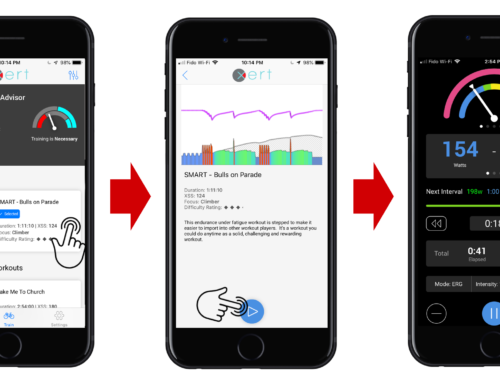
To create a manual activity, use the Fitness Planner and click on the date of your activity: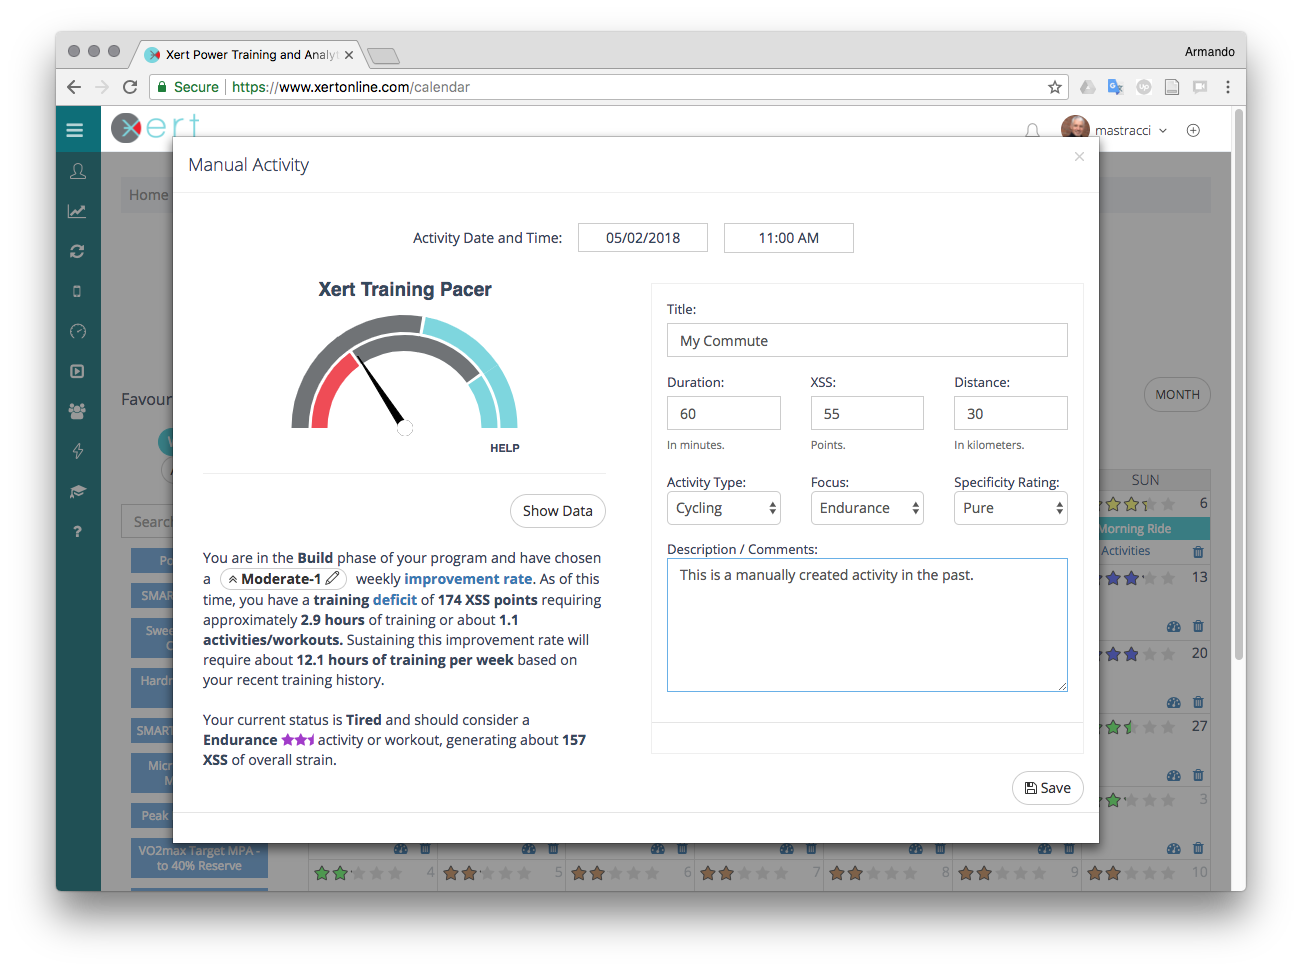
You’re ready to Xert!
Xert will analyze your uploaded/synced activities one-by-one, second-by-second, to determine your Fitness Signature for each activity. Using the goals you set for yourself – target event date, athlete type, and improvement rate – and your historical performance and training history, the Xert Adaptive Training Advisor will maintain a customized plan for you and serve you specific workouts tailor-made to help you reach your goals. And every time you upload a new activity, Xert will analyze the data to update your plan.
Happy Training.