Your smart trainer comes with many different modes available to be used for performing your workouts. In this article, we’ll list what some of the different trainer modes are, as well as when you might want to use different modes.
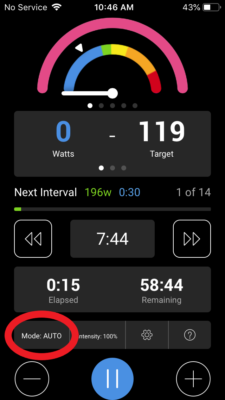
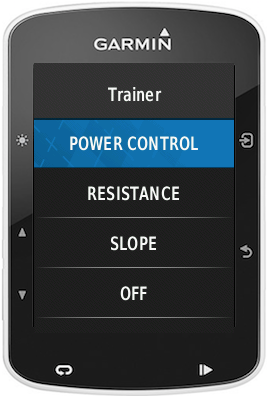
On Xert EBC (Android and iOS), you’ll find trainer mode in the bottom left-hand corner of the screen. To toggle between trainer modes, simply tap the Trainer Mode. In the Xert Workout Player for ConnectIQ, you can switch modes by bringing up the trainer menu (tap the menu button on bottom right for Edge 820/1000 series devices, or press the ‘back’ button on bottom right for Edge 520 series devices). From there, you can select the trainer mode that you’d like to use.
Xert EBC Trainer Modes (Android/iOS)
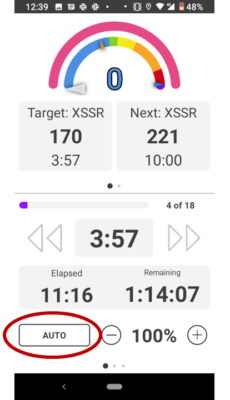
- AUTO – This is the default setting, and is the mode you will be using most often while using Xert EBC on Android and iOS. AUTO mode simply means that the trainer automatically switches between ERG mode and SLOPE mode.
- This mode is designed to support Xert’s MIXEDMODE workouts, where the resistance for some intervals are controlled automatically (like ERG mode) and other intervals will be completed in SLOPE mode (you’ll need to use gears and cadence to hit the power targets).
- Any intervals that are performed in SLOPE mode during your workout will have a ‘SLOPE x.x%’ indicated in the Xert EBC app & on the session player!
- SLOPE – This trainer setting allows your trainer to hold a virtual slope. When you switch to SLOPE mode, you will need to use your bike’s gearing and your cadence to meet the interval targets.
- You can adjust the simulated slope percentage by tapping the UP/DOWN arrows on iOS and Android. Each tap adjusts the simulated slope up/down 0.5%
- Generally, you’ll find that a “false flat” slope of approximately 1.5 – 2.5% will provide the best results, but feel free to experiment on your own and determine what works best for you.
- When moving from very low powers (< 150W) to very high powers (>300W), you’ll notice a bit of a lag as your trainer spins up and gains inertia. Once at speed, you may notice a slight drop in power, so you may need to shift up another gear or increase your cadence.
- ERG – This trainer setting holds your smart trainer at a fixed, absolute intensity (i.e. 100 W), regardless of your cadence or gearing.
- NOTE: This mode will not automatically follow the intensity of the workout intervals – use AUTO mode instead.
- To adjust the intensity of ERG mode, use the UP/DOWN arrows on iOS and Android. Each tap adjusts the intensity up/down 5 Watts.
- RESISTANCE – This trainer setting simulates a magnetic or fluid ‘dumb trainer’. Similar to SLOPE mode, in this trainer mode, you will need to control your power output through usage of your bike’s gearing and your cadence.
- You can adjust the resistance percentage by tapping the UP/DOWN arrows on iOS and Android
- The amount of resistance varies from trainer to trainer, so if you plan to use this mode, you may need to experiment and find the setting which works best for you.
- OFF – This turns off all trainer control, and essentially turns your smart trainer into a dumb trainer. This mode can be helpful if you wish to let another app control your trainer (Zwift, for example).
Xert Workout Player Trainer Modes (Garmin)
- Power Control – This is the default setting, and is likely the mode you will be using the vast majority of the time while using Xert workout players on Garmin. In Power Control mode, the trainer automatically matches the resistance of your trainer power to match the interval target of your workout.
- This mode also supports mixed mode workouts, where some intervals can be controlled automatically and other intervals will be completed in SLOPE mode. The app will automatically switch back and forth between controlling the resistance for you and SLOPE mode.
- Resistance – This trainer setting simulates a magnetic or fluid ‘dumb trainer’. Similar to SLOPE mode, in this trainer mode, you will need to control your power output through usage of your bike’s gearing and your cadence.
- You can adjust the resistance percentage by tapping the UP/DOWN arrows on iOS and Android
- The amount of resistance varies from trainer to trainer, so if you plan to use this mode, you may need to experiment and find the setting which works best for you
- Slope – This trainer setting allows your trainer to hold a fixed, virtual slope. In this mode, you are responsible for controlling your power output through your use of your bike’s gearing and your cadence.
- You can adjust the simulated slope percentage by tapping the UP/DOWN arrows on iOS and Android. Each tap adjusts the simulated slope up/down 0.5%
- Generally, you’ll find that a “false flat” slope of approximately 1.5 – 2.5% will provide the best results, but feel free to experiment on your own and determine what works best for you.
- When moving from very low powers (< 150W) to very high powers (>300W), you’ll notice a bit of a lag as your trainer spins up and gains inertia. Once at speed, you may notice a slight drop in power, so you may need to shift up another gear or increase your cadence.
- Off – This turns off all trainer control, and essentially turns your smart trainer into a dumb trainer. This mode can be helpful if you wish to let another app control your trainer (Zwift, for example).
Which trainer mode should I be using?
In general, AUTO mode is the default, recommended trainer mode for the vast majority of following a workout using one of the Xert Workout Players. Use this if you wish to simply pedal along and have the Xert workout player automatically control your effort through the entire workout.
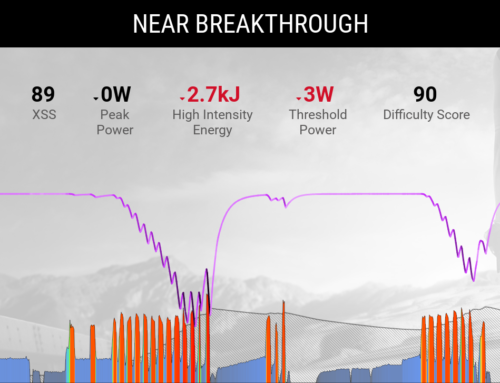
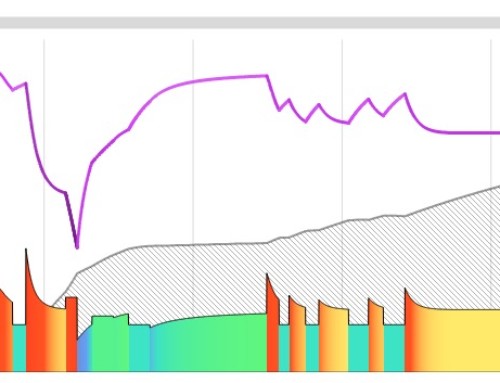
When doing a high intensity workout, or one of the Breakthrough workouts in the library, you may want to experiment with performing these workouts using SLOPE or RESISTANCE modes. Using SLOPE/RESISTANCE means that you will need to pay attention to your power output relative to the power targets of the workout and make adjustments as you go. However, using one of these modes during a breakthrough workout has some unique advantages. Firstly, you can avoid the dreaded ‘spiral of death’ (or the feeling of getting bogged down by your trainer if your cadence gets too low) towards the end of a breakthrough interval. Additionally, if you are using SLOPE mode for a breakthrough effort, you can continue pushing until you truly reach a point of failure, even if that point is beyond when an interval ‘ends’. When using AUTO mode, the interval will end exactly when it’s told to, even if you haven’t been able to fully express your fitness signature, or if you have even more to give.