Setting Up Your Garmin Device
(Read this guide prior to following the video on setting up the app. There are some differences with the latest version of the app.)
Use the Garmin app store to download the app onto your Garmin. Once the app is downloaded, you’ll need to make some initial configurations on your Garmin depending on whether you’d like to set up with:
- Option A) Smart trainer only
- Option B) Power Meter only
- Option C) Smart trainer and power meter
For Option C, you’ll be using Powermatch, which allows the power data coming from your power meter to be used to control the trainer.
Option A) Smart trainer only
Configure your smart trainer:
For Edge 520/820:
- On your Garmin go to ‘Settings’
- Select ‘Sensors’
- Search for and select your smart trainer. You may need to select ‘Add Sensor’ and press ‘Search All’ or ‘Indoor Trainer’
For Edge 1030:
- Select Training > Indoor Trainer > Pair ANT+ Bike Trainer.
- Select the indoor trainer to pair with your device.
- Select Add.
Option B) Power meter only
Use the Garmin standard sensor configuration for your power meter. This power meter is a separate power meter from the one that comes with your smart trainer. It will likely be a crank, crank arm, pedal or wheel-based power meter such as PowerTap, Stages, Garmin Vector, etc.
Option C) Smart trainer and power meter
Use the Garmin standard sensor configuration for your power meter only. If your trainer or any sensor that uses your trainer’s ANT ID is configured, you will need to remove all of them from your Garmin sensors menu:
For Edge 520/820/1000:
- Set up your power meter. On your Garmin, navigate to Settings > Sensors, then select your power meter, ensure ‘enable’ is selected, and press ‘Connect’.
- Remove your smart trainer on your Garmin. Navigate to Settings > Sensors > select your smart trainer > Remove > Confirm;
- Repeat for power meter, cadence or other sensors that use the same ANT ID as your trainer.
For Edge 1030:
- Set up your power meter . On your Garmin, navigate to Settings > Sensors, then select your power meter, ensure ‘enable’ is selected (little grey toggle is on the right side of the ‘switch’), and press ‘Connect’.
- Remove your smart trainer on your Garmin by navigating to Training > Indoor Trainer > Trainer Sensor. Select your indoor trainer already paired with your device and press ‘Remove’ and confirm.
- Repeat for power meter, cadence or other sensors that use the same ANT ID as your trainer.
Configure the Xert Player
- Open Garmin Connect Mobile on your mobile phone
- Wait for your Garmin Edge device to connect to your phone.
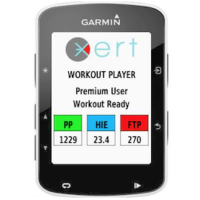
- Open the Xert Workout Player app under the Connect IQ menu (on the 520) or with the IQ icon (820, 1000, 1030).
- Look for a Garmin Connect Mobile notification on your phone that is prompting you to log in to Xert.
- Enter your Xert username and password and log in.
- Authorize the connection.
- On your Garmin Edge, it will obtain your workout and get it ready.
For Option C) Smart trainer with power meter, follow these additional steps.
- Click the START/STOP button on the Garmin. Select START LATER for this first time setup.
- Open the Trainer Control page (‘back’ button on Edge 820/1000/1030, bottom right button on Edge 520) and choose “SELECT”.
- Once your trainer has been found, choose it.
Click the START/STOP button on your Garmin and select ‘START NOW’. If you previous chose “START LATER”, choose “START WORKOUT” to begin playing your workout. Open the Remote Player with your browser to view the workout on your desktop/iPad.
Indoor vs. Outdoor Workouts
If you are doing your workout indoors, in the Xert Player app, ensure GPS is OFF (see table below for help). This is the default value. For outdoor workouts, you should change the value – set GPS to ON.
Gestures/buttons and description:
| Operation | Edge 1030/1000/820 | Edge 520/520+ | Mode | Description |
|---|---|---|---|---|
| SELECT | Tap Screen | Top Right Button | Workout Mode | Opens the Options function:
|
| BACK | Tap Back Button | Bottom Right Button | Workout Mode | Opens the Trainer Control functions:
|
| START/STOP | Start/Stop Button | Start/Stop Button | Workout Mode | Opens the Workout Paused function:
|
| LAP | Lap Button | Lap Button | Workout Mode | Opens the Interval function:
|
| INCREASE WORKOUT INTENSITY | Swipe Left / Tap Increase on Screen | Up Button | Workout Mode | Adjusts Wattage:
|
| DECREASE WORKOUT INTENSITY | Swipe Right / Tap Decrease on Screen | Down Button | Workout Mode | Adjusts Wattage:
|
| START/STOP | Start/Stop Button | Start/Stop Button | Activity Mode | Opens the Activity Paused function:
|
There are 4 STATUS PAGES, each showing:
- Chosen Workout, Workout Duration and Fitness Signature.
- Total XSS, XLSS (Low XSS), XHSS (High XSS), XPSS (Peak XSS), Total Work, XEP (Xert Equivalent Power), Distance
- ConnectIQ Version, Phone Connection Status, Battery Level, Memory Usage
- Sensors Attached, Trainer Control Operation, Powermatch Slope, Powermatch Intercept
- Player determines Power Meter wattage as Slope * Trainer wattage + Intercept
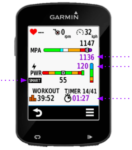
On Screen, what you see:
Did you know?
You can do workouts outdoors.
- Turn GPS ON by tapping your screen / clicking the SELECT button and then changing GPS from OFF (default) to ON. This will include GPS, Altitude and GPS-based speed in your recording
You don’t need to start your ‘workout’ right away.
- When you start your ‘activity’ (ride), open the Workout Player and allow the workout to load. Then, press the Start/Stop button and select “Start Later”. Your Garmin will record your activity/ride until you decide to begin your workout. When you’re ready to begin your workout, press the Start/Stop on your Garmin unit and select “Start Now”.
- Once your workout is done, and you’ve decided to keep riding, press the Start/Stop button on your Garmin unit and select “End Workout”. When you’re done your ride, press the Start/Stop button and select “Save” to end – and save – the entire activity.
- If you need to skip an interval – if you’re unable to finish one, for example – press the lap button on your Garmin and select ‘Skip’
- If you need to stop in the middle of an interval (have you ever come to a stoplight in the middle of an interval?), press the Start/Stop button. When you’re ready to restart, select ‘Resume’.
You can use ‘Powermatch’.
- Powermatch – which means that the resistance you feel on your smart trainer is being guided by the power data from your bike’s onboard power meter (crank, hub or pedal based for example) – can be used with the the Xert Workout Player. Enabling this features means that if you’re using the same bike outdoors as your do indoors on your trainer, the same power meter is also being used. This removes the variability commonly experienced between different power meters and trainers. To set it up, enable and configure your power meter as a sensor in the Garmin sensors menu (not in the Xert app), then configure your smart trainer using the smart trainer SELECT feature in the Xert Workout Player. Note that if your smart trainer is configured as a sensor in the Garmin sensors menu, it will not be possible to use Powermatch.
You can do SMART workouts & Intervals
- When doing a SMART workout or interval (these intervals are based on strain and fatigue) you’ll see some additional information. The word ‘SMART’ will appear on the left side of the screen, and your current power, the interval countdown timer, and target MPA will be shown in purple. On the MPA bar, the upper value is your current MPA and the lower value is the target (final) MPA for the interval. When the timer is purple, the player will attempt to get your MPA to the target value by the end of the interval.

